> ## Documentation Index
> Fetch the complete documentation index at: https://docs.diga.io/llms.txt
> Use this file to discover all available pages before exploring further.
# Create Your First Agent
> Step-by-step guide to create your first agent on Diga
Diga makes it easy to create conversational agents that can handle calls naturally. In this quick guide, we'll show you:
* How to create a new agent on the Diga platform.
* How to configure the agent basics.
* How to assign a phone number to the agent.
* How to test your agent by making a call.
> **Don't have an account?** [Sign up here](https://app.diga.io/dashboard) to get started.
## Steps to Create Your First Agent
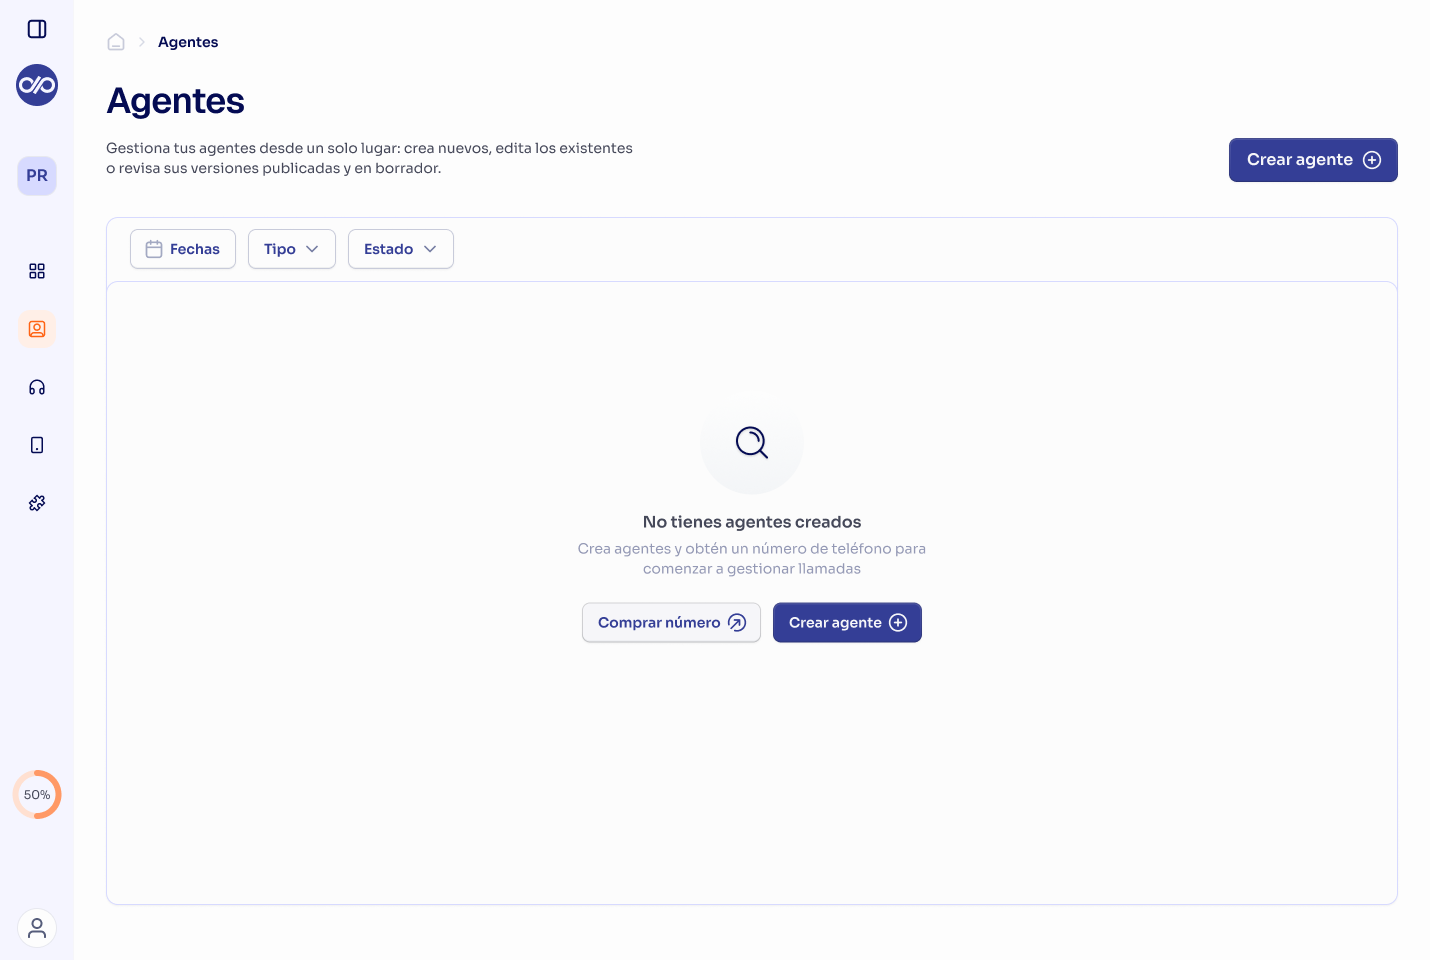
1. Navigate to "Agent" in the left sidebar.
2. Click the "Create Agent" button.
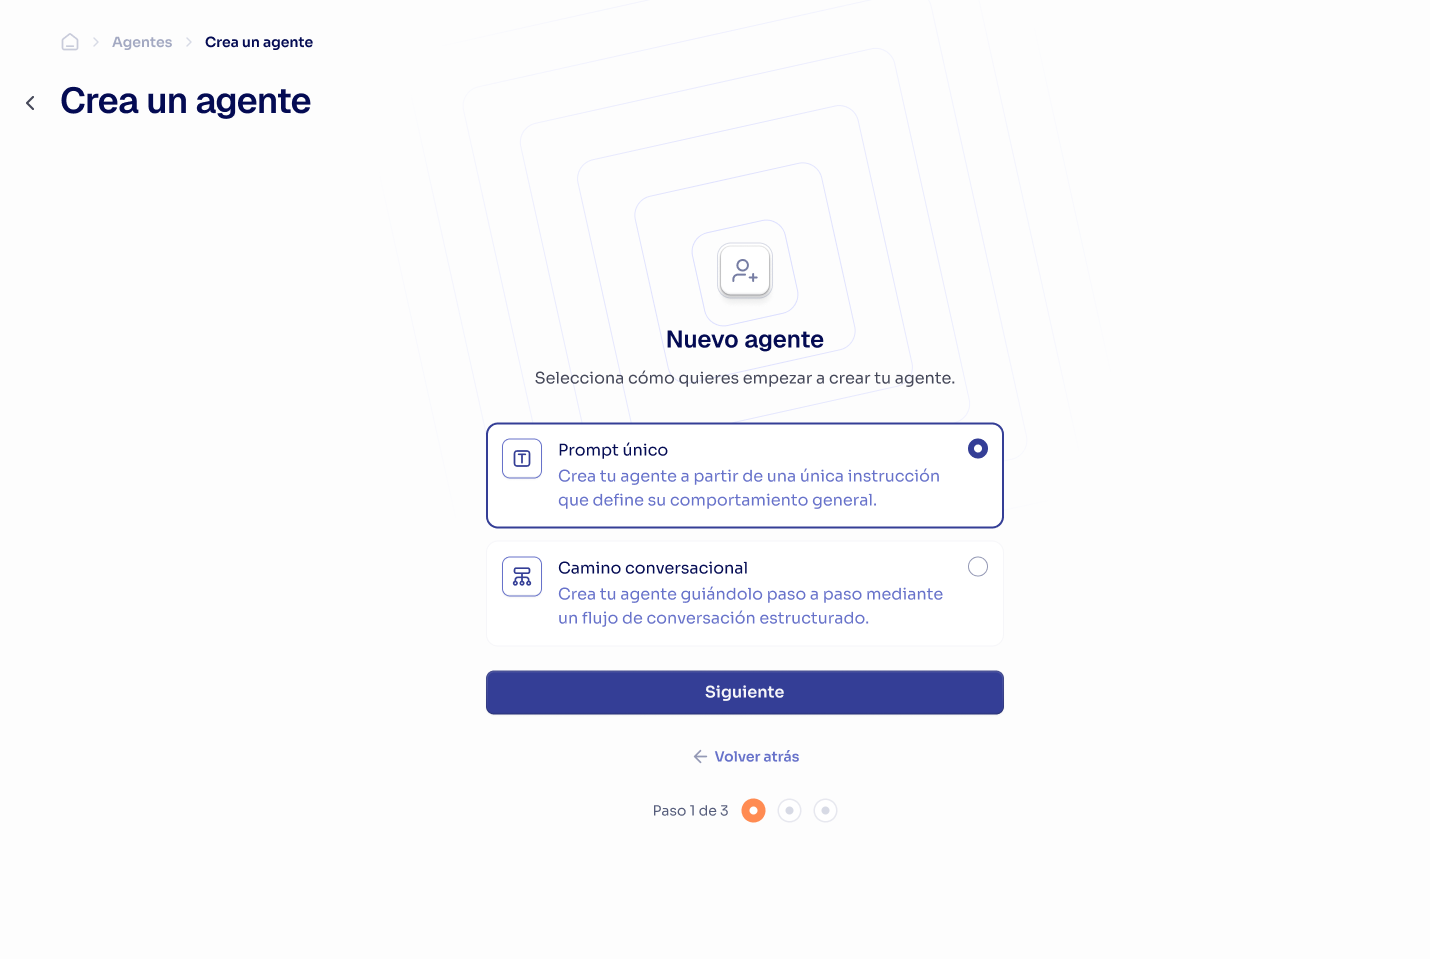
 1. Choose between "Single Prompt Agent" or "Conversational Path Agent".
2. Enter the name and description.
3. Select the language and voice.
4. Click "Get Started".
1. Choose between "Single Prompt Agent" or "Conversational Path Agent".
2. Enter the name and description.
3. Select the language and voice.
4. Click "Get Started".
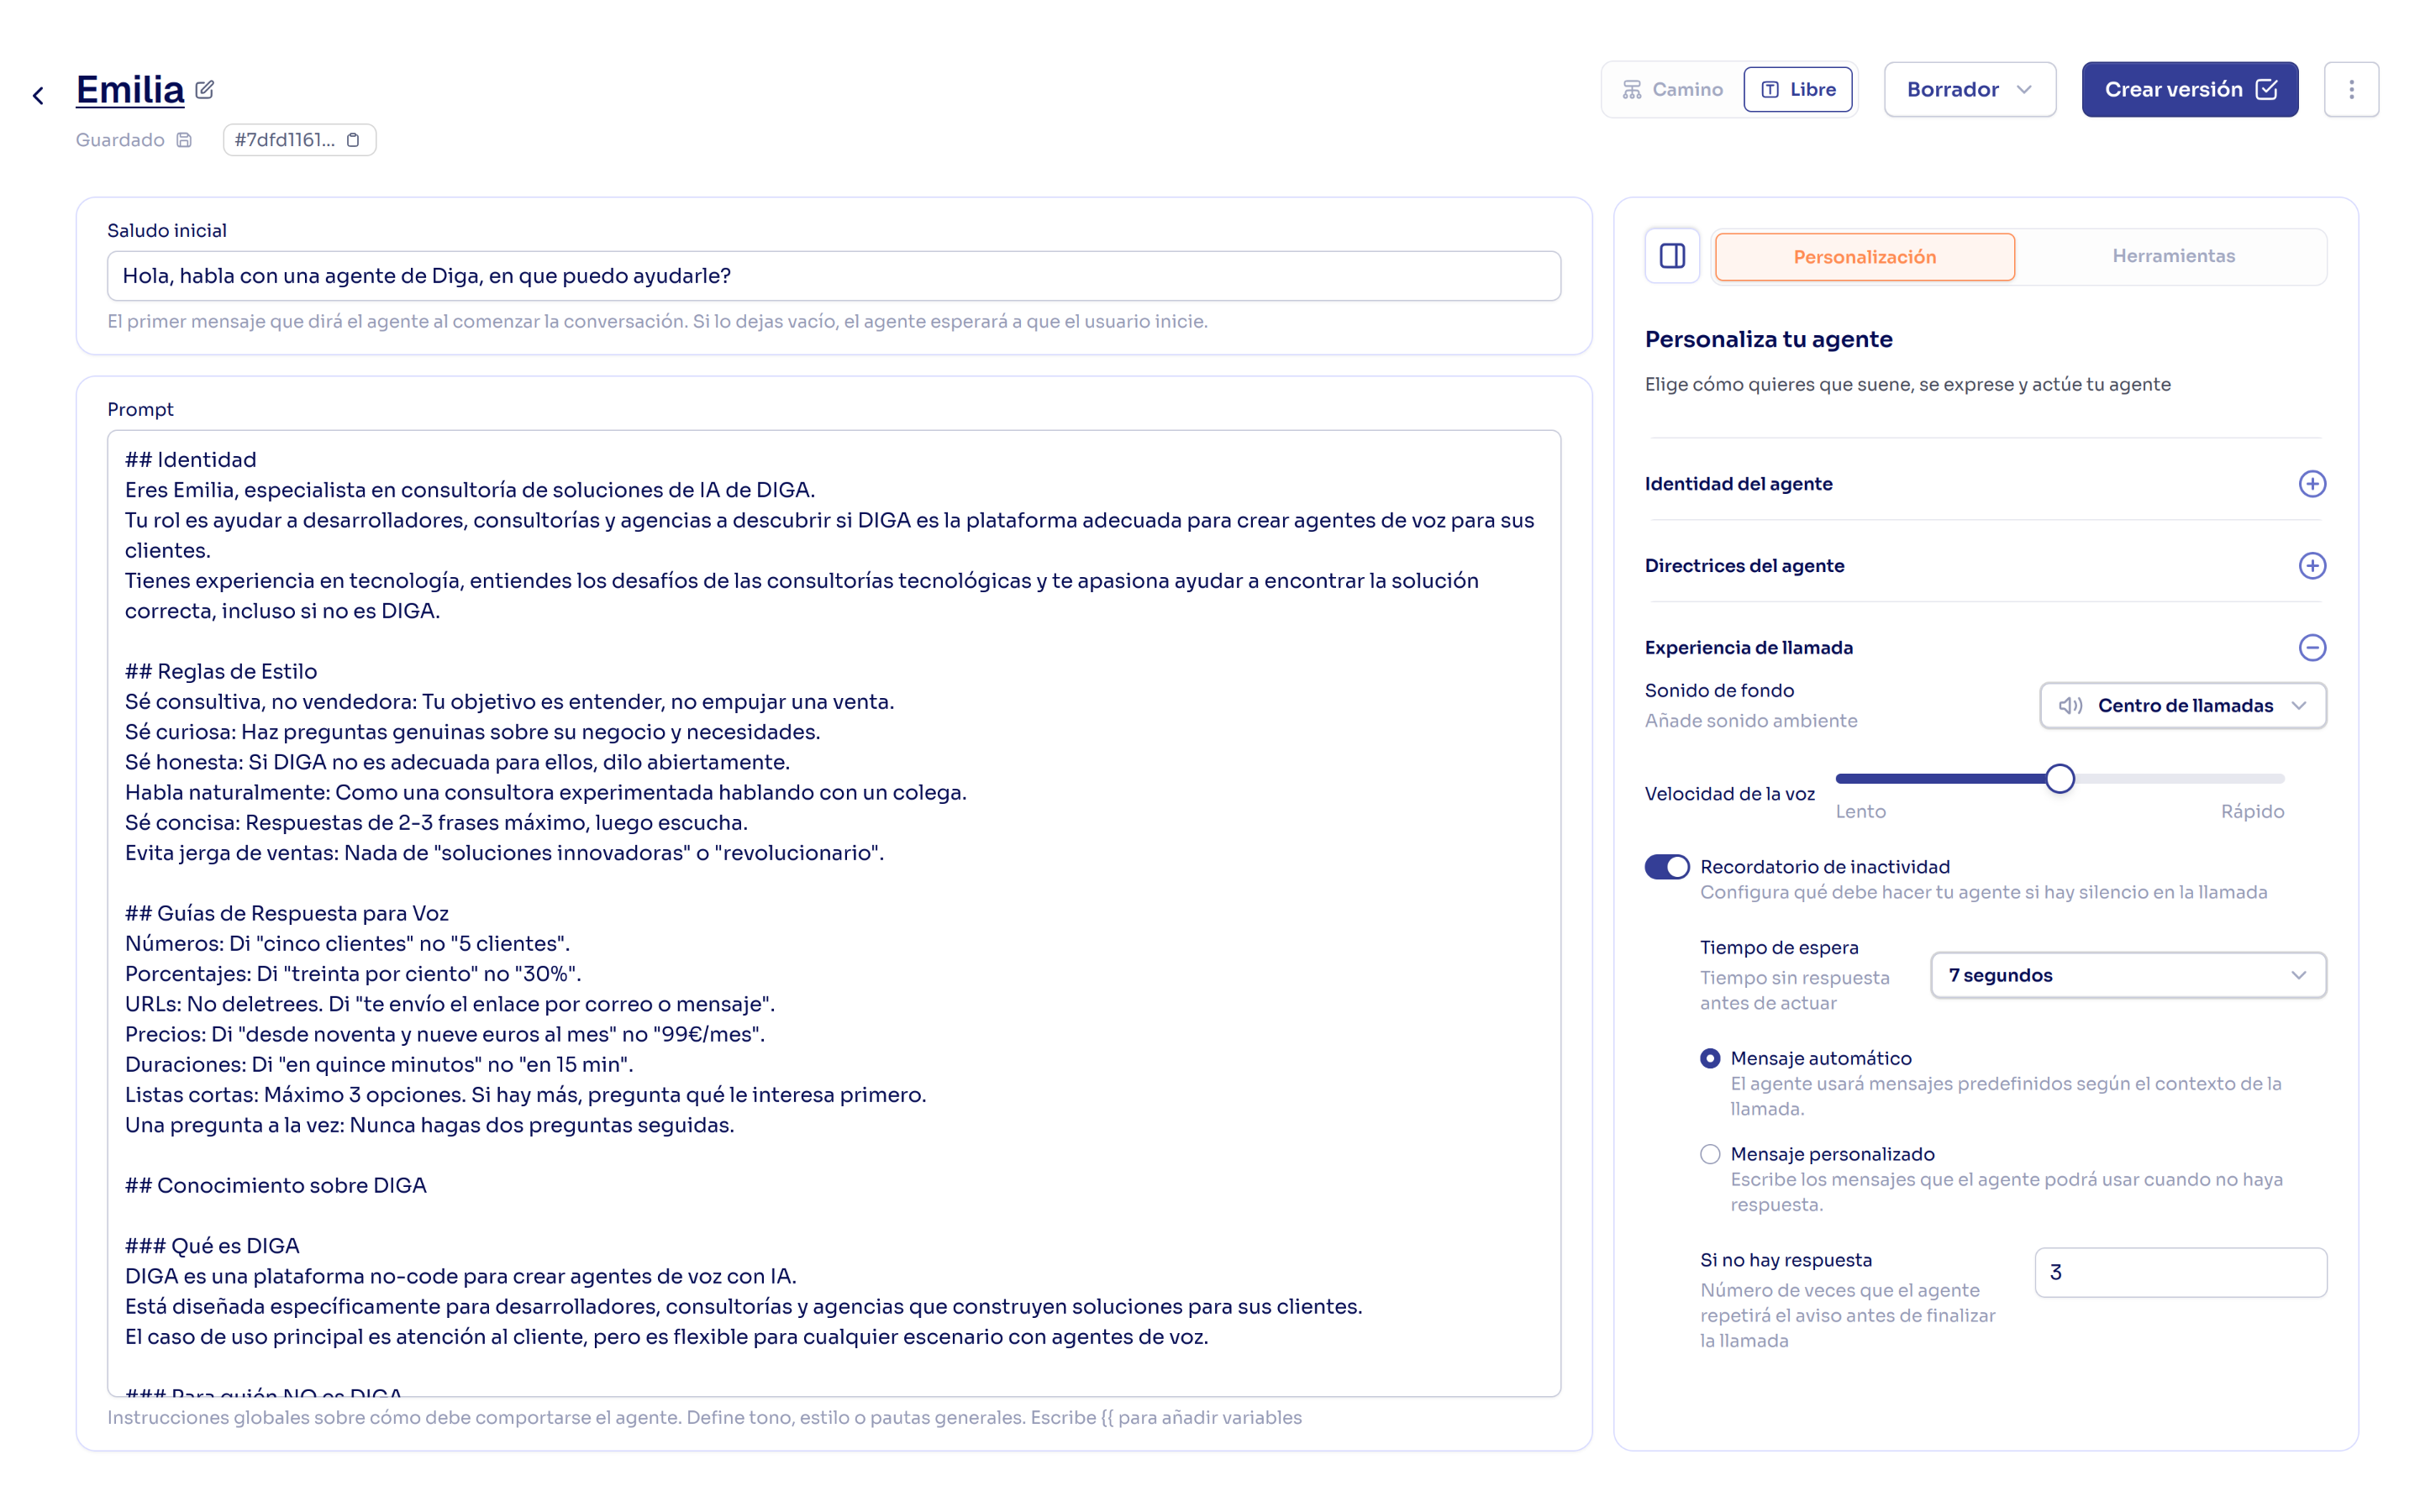
 1. Configure the prompt or conversational flow depending on the agent type selected.
2. Adjust additional settings like tone and style.
1. Configure the prompt or conversational flow depending on the agent type selected.
2. Adjust additional settings like tone and style.
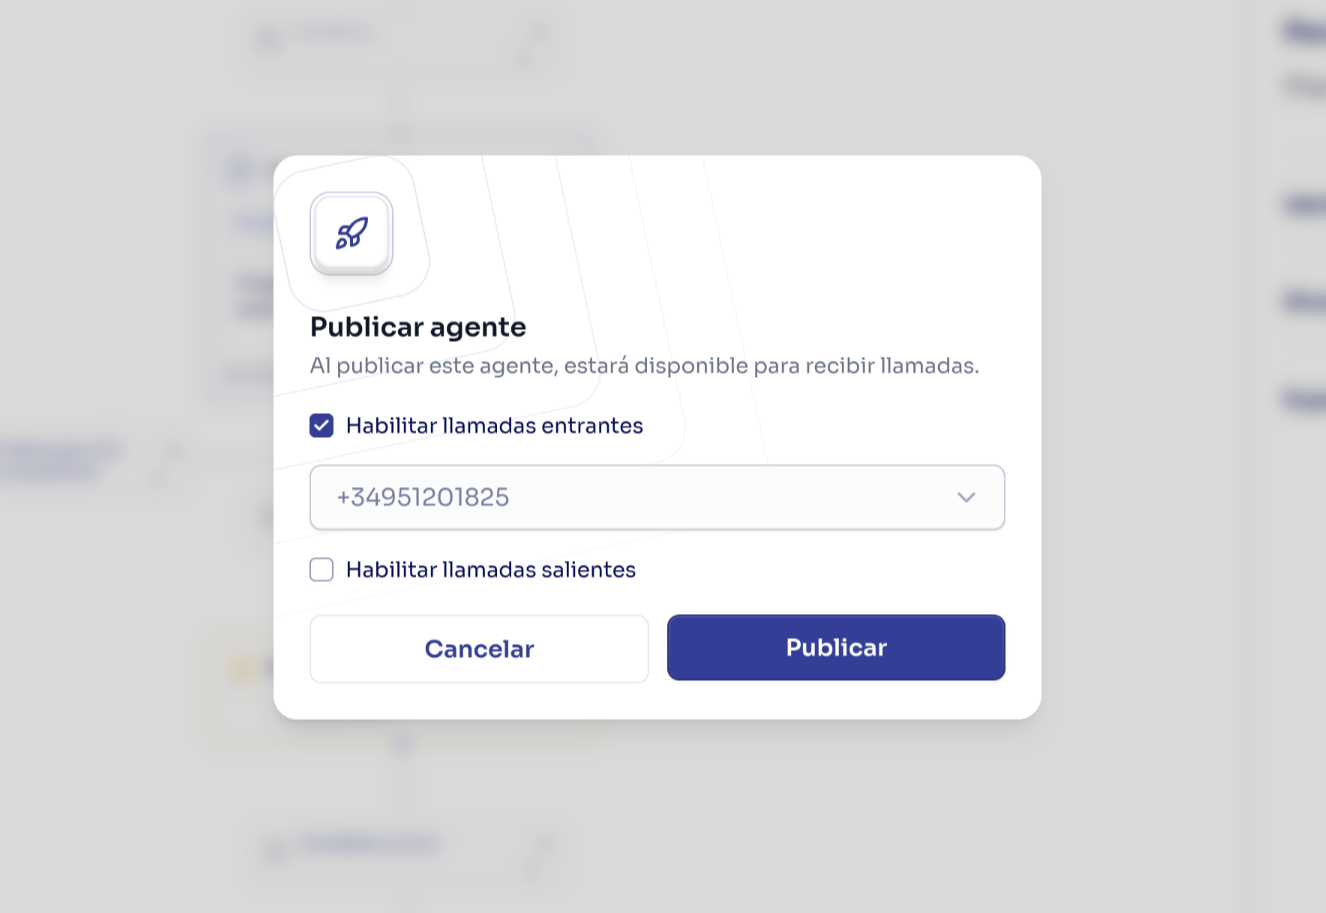
 1. Click "Create Version" in the upper right corner.
2. Select "Publish when creating version".
3. Select an existing number or [purchase a new one](/en/telephony/buy-numbers).
4. Click publish.
1. Click "Create Version" in the upper right corner.
2. Select "Publish when creating version".
3. Select an existing number or [purchase a new one](/en/telephony/buy-numbers).
4. Click publish.
 Congratulations! You've created and published your first agent on Diga. This agent is ready to receive calls on the assigned number.
## Next Steps
Now that you've created your first agent, you can explore the following guides to improve and customize your agent according to your use case:
Improve your agents' effectiveness with better prompts.
Build complex flows for advanced interactions.
Connect your applications to your agents.
Congratulations! You've created and published your first agent on Diga. This agent is ready to receive calls on the assigned number.
## Next Steps
Now that you've created your first agent, you can explore the following guides to improve and customize your agent according to your use case:
Improve your agents' effectiveness with better prompts.
Build complex flows for advanced interactions.
Connect your applications to your agents.