> ## Documentation Index
> Fetch the complete documentation index at: https://docs.diga.io/llms.txt
> Use this file to discover all available pages before exploring further.
# Workflow Templates
> Use pre-configured workflows to get started quickly with proven automations
## What are Templates?
Templates are pre-configured workflows you can copy to your project with a single click. Each template includes the trigger, actions, and logic needed for a specific use case. You just need to fill in the variables (like API keys or IDs) and you're ready to go.
When you copy a template, an independent copy is created in your project. You can modify it freely without affecting the original template.
## Using a Template
From the **Workflows** section of the dashboard, click **Templates** to see the catalog of available templates.
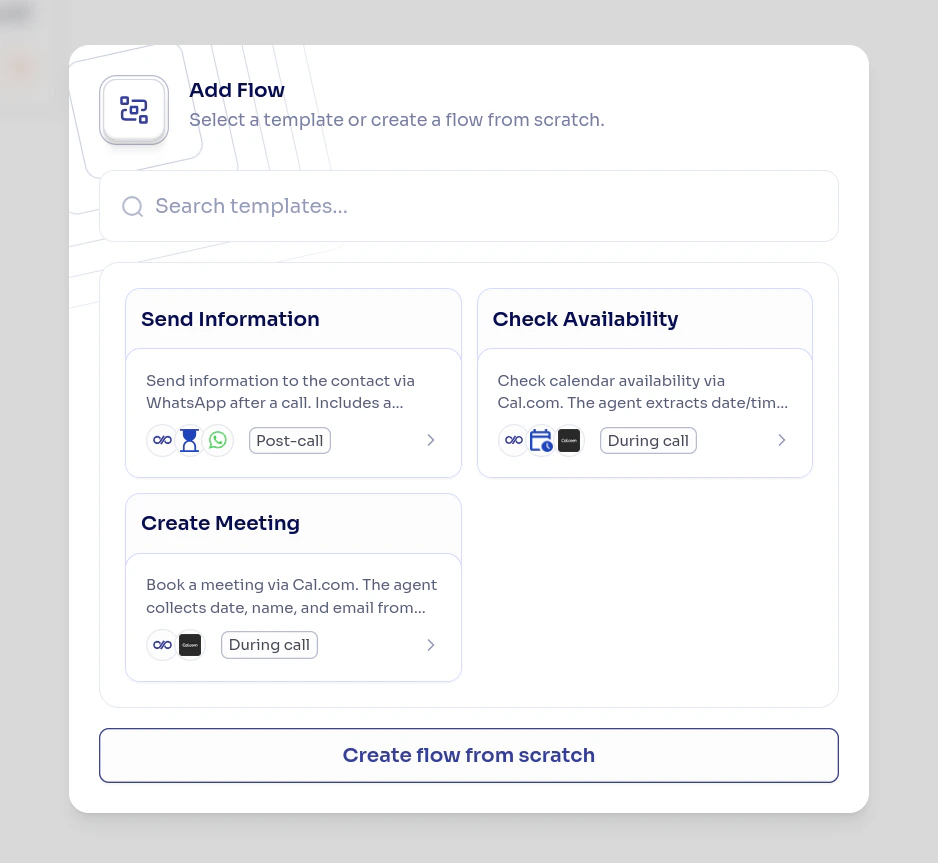 Click on the template you want to use to see its details: what it does, which pieces it uses, and what variables you need to configure.
Click **Use Template** to create the workflow in your project. The workflow will be created in a **disabled** state so you can review it before activating it.
Each template may have variables you need to fill in before copying. For example:
* An API key to connect with an external service
* A webhook URL
* A Slack channel ID or Google spreadsheet ID
If the template uses pieces that require authentication (Gmail, Slack, HubSpot, etc.), you'll be asked to configure the necessary connections. This authorizes the piece to access your account on the service.
Review that the configuration is correct and publish it. Once published, enable it so it starts executing.
Remember that after copying a template you need to **publish** and then **enable** the workflow. You also need to [assign the workflow to an agent](/en/build/flows/assign-agents) if it uses Diga triggers (Call Finished or Function Call).
## Modifying a Copied Template
Once copied, the template is a regular workflow that you can modify however you want:
* Add or remove actions
* Change the condition logic
* Adjust the data sent to each service
* Add additional steps
This lets you use the template as a starting point and customize it to your needs.
## Next Steps
Learn to build custom workflows step by step.
Connect your workflows with agents to activate them.
Click on the template you want to use to see its details: what it does, which pieces it uses, and what variables you need to configure.
Click **Use Template** to create the workflow in your project. The workflow will be created in a **disabled** state so you can review it before activating it.
Each template may have variables you need to fill in before copying. For example:
* An API key to connect with an external service
* A webhook URL
* A Slack channel ID or Google spreadsheet ID
If the template uses pieces that require authentication (Gmail, Slack, HubSpot, etc.), you'll be asked to configure the necessary connections. This authorizes the piece to access your account on the service.
Review that the configuration is correct and publish it. Once published, enable it so it starts executing.
Remember that after copying a template you need to **publish** and then **enable** the workflow. You also need to [assign the workflow to an agent](/en/build/flows/assign-agents) if it uses Diga triggers (Call Finished or Function Call).
## Modifying a Copied Template
Once copied, the template is a regular workflow that you can modify however you want:
* Add or remove actions
* Change the condition logic
* Adjust the data sent to each service
* Add additional steps
This lets you use the template as a starting point and customize it to your needs.
## Next Steps
Learn to build custom workflows step by step.
Connect your workflows with agents to activate them.